Winter Sowing
Winter sowing is an inexpensive, low-effort method of starting seeds outdoors using recycled plastic containers of all shapes and sizes. There’s no need to invest in grow lights, heat mats, or elaborate indoor setups. Instead, you create miniature greenhouses from everyday plastic containers and let nature do the work.
By growing plants outdoors from the start, winter sowing mimics natural conditions and produces strong, resilient seedlings ready for the garden.
Benefits of Winter Sowing
Winter sowing offers many advantages for home gardeners:
No need to purchase seed-starting trays or spend time cleaning and sterilizing last year’s containers
No need to buy or build indoor grow shelves or find space in the house
Seeds can be started much earlier than traditional spring planting
Little to no risk of losing seedlings to damping-off disease
No need to harden off seedlings before transplanting
Seedlings are hardier and tend to have higher survival rates
Budget-friendly and environmentally responsible through recycling
Typically, winter sowing begins after the winter solstice (December 21), when outdoor temperatures are consistently cold. Many gardeners prefer to wait until January, after the holidays, to begin.
Choosing Seeds for Winter Sowing
Not all seeds are equally suited to winter sowing, so prioritizing is key. A good winter sowing plan focuses on:
Seeds that require cold stratification
Perennials and native plants
Cold-hardy annuals, herbs, and vegetables
Warm-season vegetables, herbs, and annuals that can be started outdoors in early spring
Time spent identifying, organizing, and prioritizing seeds is well worth the effort and leads to better results.
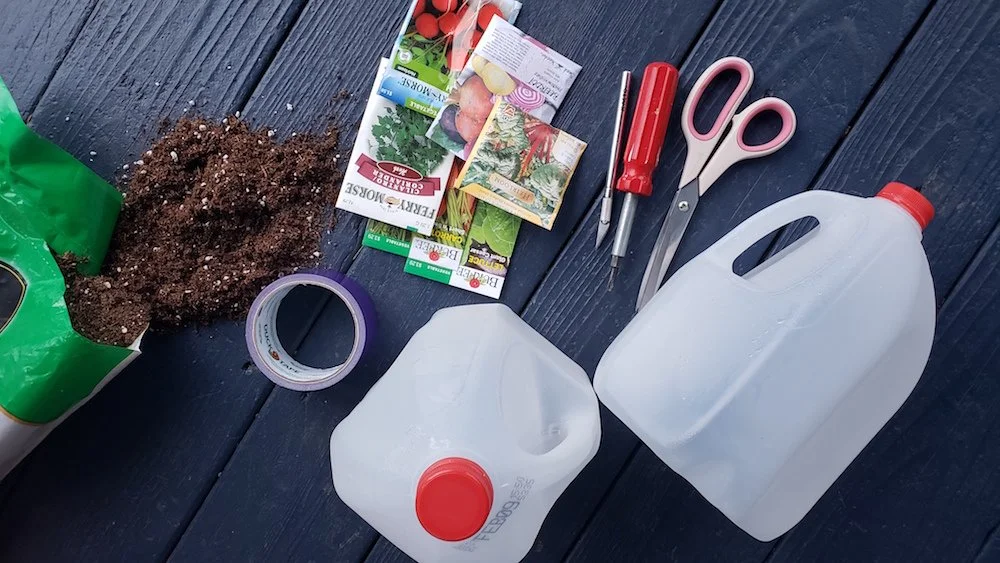
Selecting Containers
Plastic containers serve as mini greenhouses, so choosing the right ones is important:
Use food-grade plastic containers to avoid harmful chemicals leaching into the soil
Choose containers that allow light to pass through; clear plastic works best
Containers should hold 4–6 inches of soil and allow room for seedlings to grow
Plastic milk jugs, water jugs, juice bottles, and 2-liter soda bottles are ideal because their height provides adequate growing space.
Soil for Winter Sowing
Use only a seed-starting mix or potting soil without added fertilizer. Seeds contain all the nutrients needed to germinate and produce their first leaves. Fertilizer isn’t necessary until seedlings are about 3 inches tall or have developed their second set of true leaves.
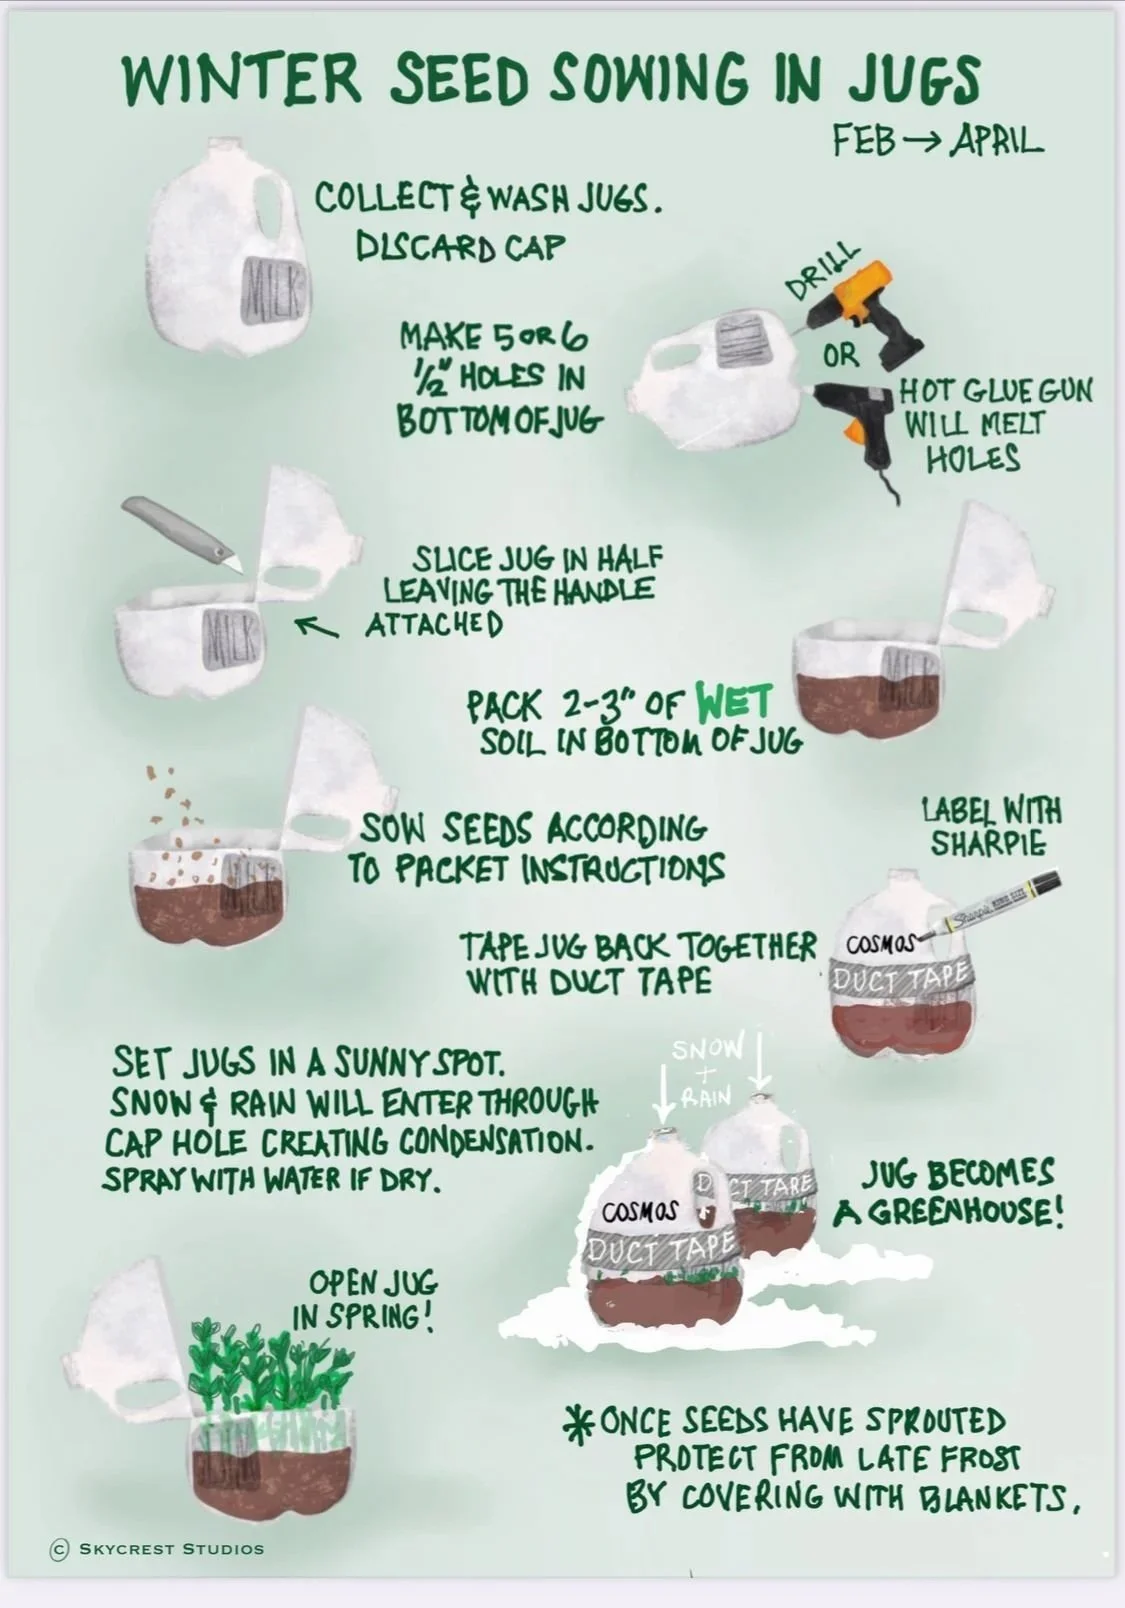
Step-by-Step: Winter Sowing in Milk Jugs
Wash plastic containers with dish soap to remove any residue.
Remove caps or lids; they are not needed.
Create several drainage holes in the bottom of each container.
Cut the container in half horizontally, leaving a small hinge if possible.
Add 3–4 inches of pre-moistened soil mix to the bottom portion. Soil should be moist, not wet.
Gently press the soil down to remove large air pockets.
Plant seeds according to the instructions on the seed packet.
Water carefully until the soil is evenly moist, taking care not to displace seeds.
Fit the top of the container back over the bottom so it overlaps, and secure it with duct tape.
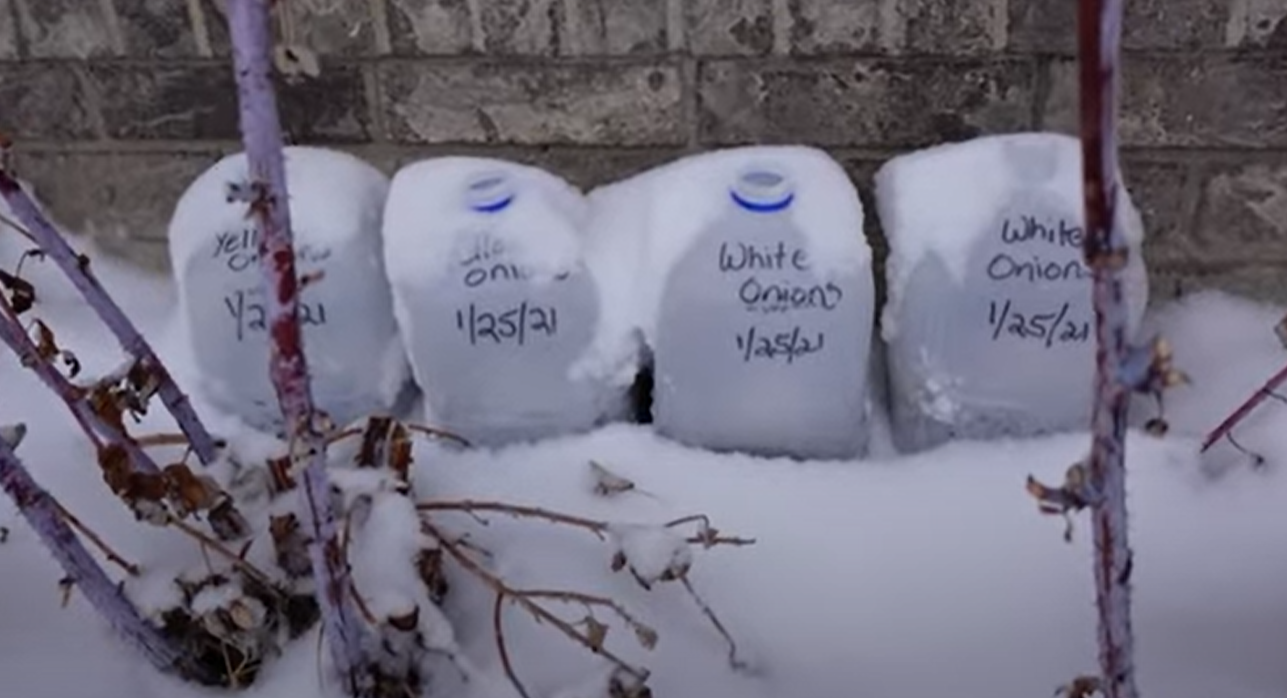
Label each container with the seed type and planting date using a waterproof marker.
Place containers outdoors on a flat surface in full sun, protected from strong winds but exposed to rain and snow.
During dry winters, periodically check moisture levels and water if needed. Otherwise, no maintenance is required until seeds sprout. Once seedlings are about 3 inches tall or have a second set of true leaves, fertilize weekly with a water-soluble fertilizer, following the manufacturer’s instructions.
As temperatures warm, remove the container tops to acclimate plants before transplanting them into the garden.
Winter sowing is a simple, natural way to grow strong, healthy plants while saving money, reducing waste, and working with the seasons rather than against them.